Build an Email by selecting Create > Email or Send your existing Email under Email > Designs

Once your email design is ready to be sent, configure the email sending details to share your message.
Configure the Sending Properties
The email sending properties, including the email subject, From Name, From Email, and Reply-to Email, can be configured prior to encountering the "Pre-Flight Checks" page. To configure the sending properties directly in the email designer, open the email, and under the Actions drop-down next to the Email Friendly Name, select Edit Properties.

Configure the properties in the resulting modal:
- Title: This is the friendly (internal) name of the email for organizational purposes.
- Subject: Enter the subject line of the email, including emojis and merge tags as appropriate.
- Pre-header: The pre-header is the first line of text a user sees when previewing the email in the email client (prior to opening the email). This field is not required.
- Check "Preheader is visible at top of email" if you would like the entered pre-header to be inserted at the top of the email design.
- From Name: The From Name is the display name or email sending name, generally the name of the business.
- For a more personal touch, try {{manager name}} at {{company name}}.
- From Email: This is the address the email will be sent from.
- By default, Ascent360 sets most new clients up on the Ascent360 domain, making the From Email businessname@ascent360.net.
- The shared domain is warmed with a positive sender reputation and is ready to be used to send emails. If you would rather send emails from your own domain, you will need to implement DNS records in the settings of your Domain Hosting Provider (these records allow Ascent360 to send emails on your domain's behalf). Please send a request to support@ascent360.com with your desired "From" address.
- Reply-to Email Address: This is the address that people who choose to respond to an email will send their response to.
- The Reply to Email Address does not need to be the same address as the "From" email and does not require DNS records.
- Tracking Parameters: If you use Google Analytics, Ascent360 can automatically append tracking parameters to every link in the email. For more information, see Email Tracking Parameters.
Send a Test Email
Before sending the email, Ascent360 recommends sending a test email after any change is made to the email design.
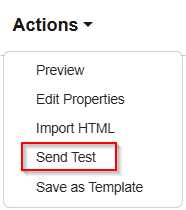
To send a test email, click the Actions drop-down and select Send Test.
Enter up to five email addresses (separated by a comma) or select from a pre-configured test list. For more information on test lists, please see Test Lists.

Merge tags and dynamic content will not display in test emails.
Ascent360 executes different steps when sending a test email versus sending a live email. When sending a test, Ascent360 sends a test email directly to the provided address; it will not reference an individual database record to attribute opens, clicks, etc. Because the test email does not reference a database record, it has no information to pull for the purposes of merge tags or dynamic content.
Merge tags and dynamic content will still be inserted for the live email send.
Pre-Flight Checks
After configuring the properties and sending a test email, click the dark blue Send Email button in the top right of the email designer. Clicking Send Email one more time will take you to the Pre-Flight Checks page.
Summary
- You may select a Campaign Type from the dropdown to describe the type of email you are sending.
Send To Section
- Select the Audience you intend to send this email to. This drop-down is required. Be sure to save your audience with an identifiable name in Audience Selector!
- If applicable, select a pre-configured seed list from the drop-down. A Seed List is a list of anyone who should receive the email even if they are not in the original audience.
- If applicable, select a Suppression list from the drop-down. A Suppression List is a list of anyone who should not receive the email even if they are in the original audience. For example, you may choose to suppress people who recently bought items included in a sale announcement.
From Section
- Review, update, and confirm the From Name, From Address, and Reply to Email Address.
Properties Section
- Review, update, and confirm the Subject, Pre-header, and Tracking Parameters.
Schedule Section
- Choose to Send Now or Schedule Send.
- Should you choose to Schedule Send, select the start date & time and Recurrence
- Toggling the Send when data is available check box forces Ascent360 to ensure that data from the previous day is available within the Platform prior to attempting an email send. This is especially helpful for audiences that rely on yesterday's data (Transaction Date = 1 day ago). If this box is checked, Ascent360 will attempt the email send at the configured time; if data from the previous day is not available, Ascent360 will delay the send, checking every 30 minutes until data is available.
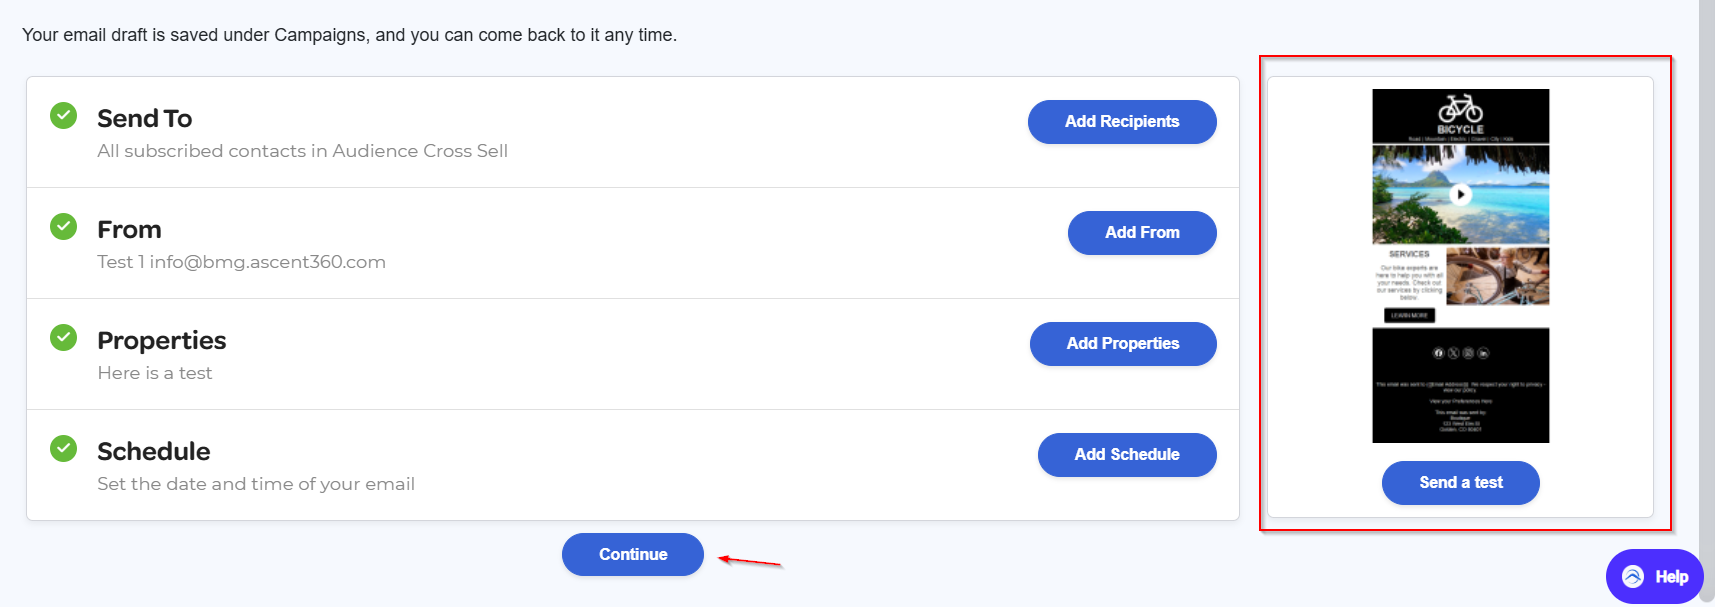
Preview Section
- The Preview Section provides a visual confirmation of the email you are sending and allows you to send another test email prior to clicking Continue.

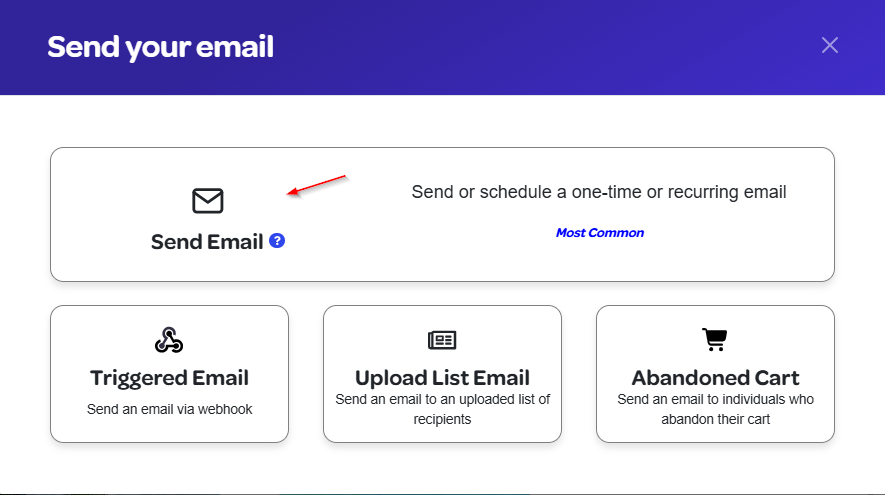
For Recurring Emails
For a recurring email campaign, you will use the campaign wizard to get started. You can navigate to Create > Start the Campaign Wizard or click on the "Start the Campaign Wizard" button on the Ascent360 home page.

Progress Bar
When you enter the Campaign Wizard, you will see a progress bar on the top of the screen showing the steps within the wizard.
Each page will ask you to chose one element of your campaign. Once you are done with the required actions, the Next button will be selectable.
A Previous button and a Save and Exit button will appear as you move through the wizard. The Previous button takes you to the previous step. The Save and Exit button saves your progress and returns you to the Your Campaigns screen. Here you can look for the name of the campaign you just saved and click the “Continue Wizard” button anytime you want to restart this campaign in the wizard exactly where you left off.

Name your Campaign
You will be asked to name your campaign and select a campaign type from the options below. Once you have named your campaign and selected a campaign type, select next.

Choose an Audience
The next step is to select which audience is going to receive your email.
You can:
- Use the search bar to find your audience by its name
- Toggle between the Audiences or Complex Audiences tab. The Audiences tab shows all audiences created in the Audience Selector. The Complex Audiences tab shows all audiences created in the Complex Audience Builder.
- Choose your audience from the picklist. The Contacts column shows how many contactable contacts are in each audience.
Chose your Email Design
The third step is choosing an email design. This screen shows email designs in the Draft status, meaning the designs have never been chosen for a previous campaign, email send, or form trigger notification.
Each email’s menu has two options:
- Select – this selects the email you want to use.
- Preview – this shows a window with a large view of the email.
Send Summary
Summary
- You may select a Campaign Type from the dropdown to describe the type of email you are sending.
Send To Section
- Select the Audience you intend to send this email to. This drop-down is required. Be sure to save your audience with an identifiable name in Audience Selector!
- If applicable, select a pre-configured seed list from the drop-down. A Seed List is a list of anyone who should receive the email even if they are not in the original audience.
- If applicable, select a Suppression list from the drop-down. A Suppression List is a list of anyone who should not receive the email even if they are in the original audience. For example, you may choose to suppress people who recently bought items included in a sale announcement.
From Section
- Review, update, and confirm the From Name, From Address, and Reply to Email Address.
Properties Section
- Review, update, and confirm the Subject, Pre-header, and Tracking Parameters.
Schedule Section
- Choose to Send Now or Schedule Send.
- Should you choose to Schedule Send, select the start date & time and Recurrence
- Toggling the Send when data is available check box forces Ascent360 to ensure that data from the previous day is available within the Platform prior to attempting an email send. This is especially helpful for audiences that rely on yesterday's data (Transaction Date = 1 day ago). If this box is checked, Ascent360 will attempt the email send at the configured time; if data from the previous day is not available, Ascent360 will delay the send, checking every 30 minutes until data is available.
Preview Section
- The Preview Section provides a visual confirmation of the email you are sending and allows you to send another test email prior to clicking Send.
