How to Send/Schedule an email in the Ascent360 Email Designer
After building and saving your email creative in the Email Designer, you can now test and schedule the email.
Send a Test Email:
- To send a test email, click the Actions menu button above the email design editor then click Sent Test.
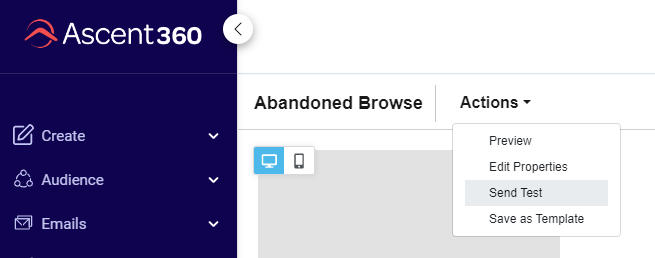
- Upon clicking, you will be prompted to provide the email address(es) to send test email to. You can either provide a list of emails separated by comma (i.e. - 123@email.com,456@email.com,789@email.com) or you can use an already uploaded test list. After entering in the emails or selecting the list, click the “Send Test Email” button.


Send/Schedule a Live Email:
Once the email has been fully tested and is ready for deployment, click the “Send Email” button.

After clicking the “Send Email” button it will bring up the send your email prompt where you click the “Send Email” button to navigate to the next step in the send process. 
After clicking the “Send Email” button again you will arrive at the final sending steps page, shown below.

Note: click Finish Later” in the top right-hand corner if you’d like to navigate back to your email to make further edits or send another test out.
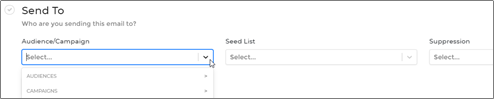
Send To Settings:
Send To: This is where you will select your audience or campaign for the email. These are directly from the saved Audiences in Audience Selector or the saved Campaigns in Campaign manager.
- Click the arrow on the right side of the drop-down list and you can choose between Audiences or Campaigns.
- Seed Lists are pre-loaded lists you can upload via the settings option in the CDP. If you have a seed list loaded, you can select that here.
- Suppression lists are also selected from Audiences/Campaigns and are used to suppress a list of contacts from an email. This is not used for generic unsubscribes and can be left blank.

From Settings:
From: This is where you the From Name, From Address and Reply-To Email Address is chosen. Note, there are default settings in place but you may have dropdown lists with options to choose from. Also, typically these are setup when you save the email but always good to double check the specifics before moving onto the next step. Click save to move to next step in process. 
Properties Settings:
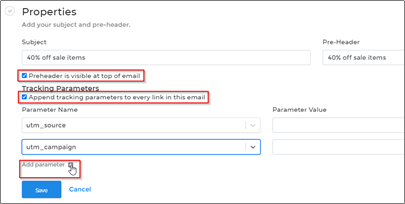
Properties: This is where you add your subject line, pre-header text and any tracking parameters. Again, this is something you can set up when you save the email as well.
- Make the Pre-Header Visible Button: Select this if you’d like the pre-header text to be visible at the top of the email.
- Tracking Parameters: Appended to every link in the email and these must be setup prior in settings to be available for selection when sending an email.
- Toggle the button to enable
- Choose parameters you’d like to add to email and enter in the value of each parameter. This can vary by email. If you need to add more parameters, click the Add Parameter + icon just beneath the parameter selection.

Schedule:
Schedule: After choosing the properties you can now schedule the email. You can choose either “Send Now” to send the email right away or select “Schedule Send.” 
If you choose “Schedule Send” you will be given the option to choose, Date and *Time. If this is a recurring email automation, you can select the recurrence cadence in the dropdown.
*Note, all times are in Mountain Standard Time so please schedule accordingly.

If you are setting up a recurring email schedule, you will be given the option have the email recur daily, weekly or monthly. Select the stop sending box and add a date to have the recurring email stop on a specific day. Click save to setup recurrence. 
After the recurrence is setup, you will see the detail below the “Make Recurring” button. 
Preview Section:
Preview: The final step of the send process is the Preview section. Here is where you can actually send the email. After all the prior steps are completed, this section has a green checkmark signifying all criteria has been met and the email is ready to be sent.

To send the email, click the yellow “Send” button on the right-hand side. A prompt will appear letting you know you’ve clicked send and that you are about to send a live email. Click “Send Live Email” to schedule or send the email!

