Use Merge Tags to leverage your data and add a greater level of personalization for your emails. Merge tags will dynamically insert information relating to the recipient based on data in Ascent360.
Add Merge Tags to Email Body
Merge Tags are available in any text content block within the email designer. In a text box, click Merge Tags on the text toolbar.

On the resulting modal, select a database field from the drop-down. You can also configure an optional Default Value that will be used if the value for the recipient is blank. After selecting a field and default value, select Insert.
Ascent360 will automatically insert merge tag notation with the following convention: {{[Field | "Default Value"]}}

Once inserted, please do not alter the merge tag notation, including the rounded and square brackets.
Add Merge Tags to Email Subject
Merge tags are also available in the subject of an email. To insert into an email subject, select Insert Merge Tags + under the Subject text box.

Configure a field and default value, as applicable. Select Insert.

Testing Merge Tags
Merge tags will not pull through to test emails. Ascent360 executes different steps when sending a test email versus sending a live email. When sending a test, Ascent360 sends a test email to the provided address; it will not reference an individual database record to attribute opens, clicks, etc. Because the test email does not reference a database record, it has no information to pull for the purposes of inserting a merge tag.
Merge tags will still be inserted for the live email send.
Merge Tag Considerations
By default, only some individual and transaction level fields are available as Merge Tags. If you would like to expose an additional field please follow the steps below
- Navigate to Database Insights > Data > Data Dictionary
- Find the field you would like make avalible as a merge tag and double click the No under "Show in email output" column and switch it to yes.
- Next, click in the blank area under the column called Email Alias Name to the right of the field you are editing and enter the name that will be displayed in the email designer.
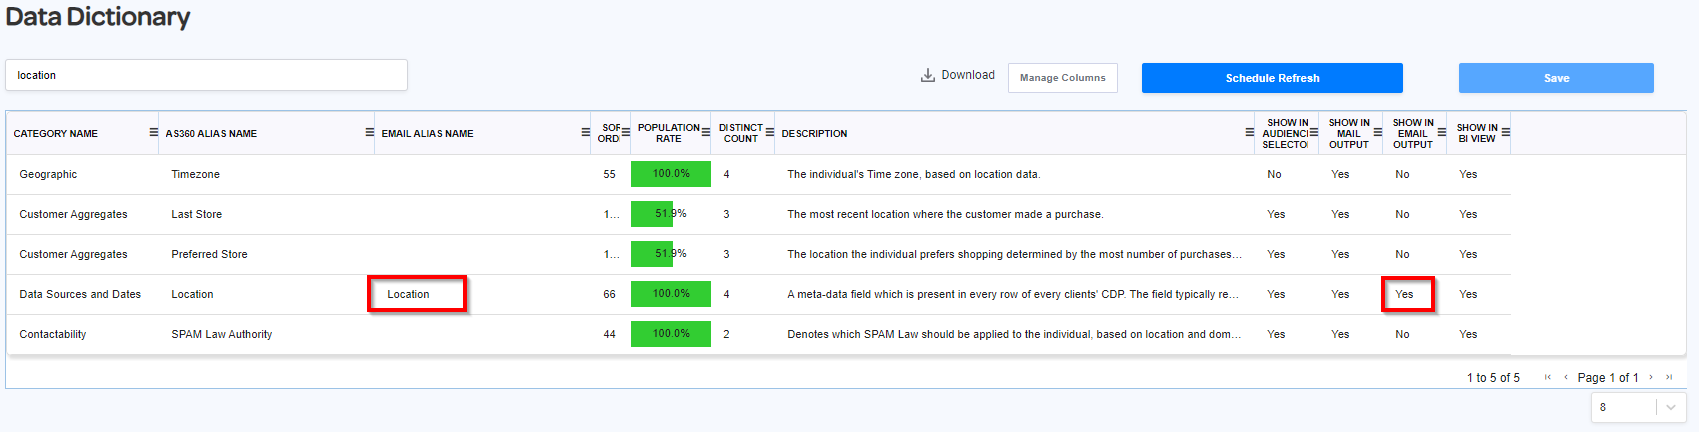
- Click the save button and the field will now be avalible in the email designer as a merge tag.

